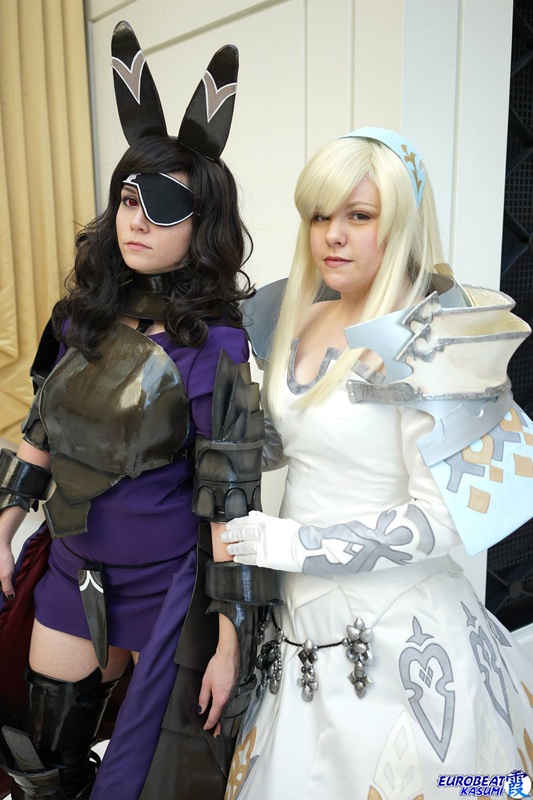
Ivybeth

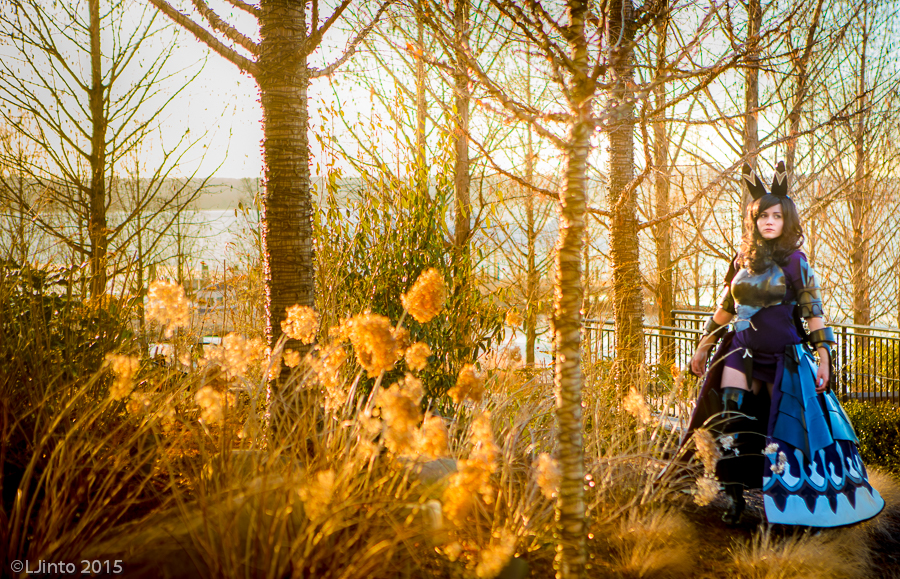
Series: Bravely Default: Praying Brage
Worn to: Katsucon 15
Difficulty: 5/5
I was on the hunt for an armor-heavy costume when my friend Krystal stumbled across the design for Ivybeth. Although I had no knowledge of the game (a beta called Bravely Default: Praying Brage) I loved the design so much that I really wanted to give it a shot.
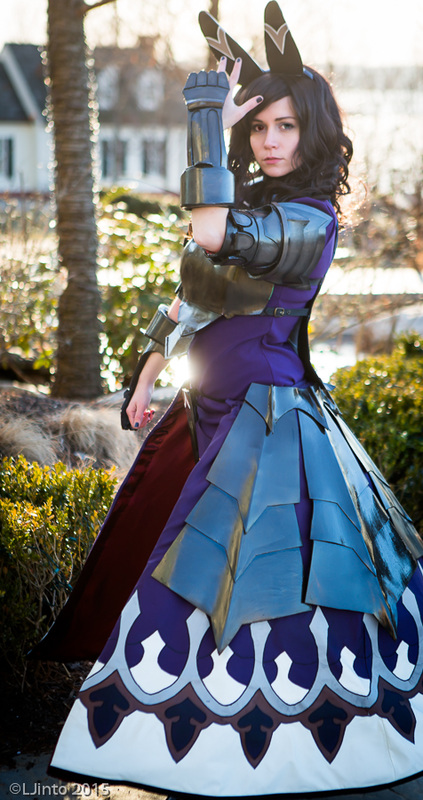
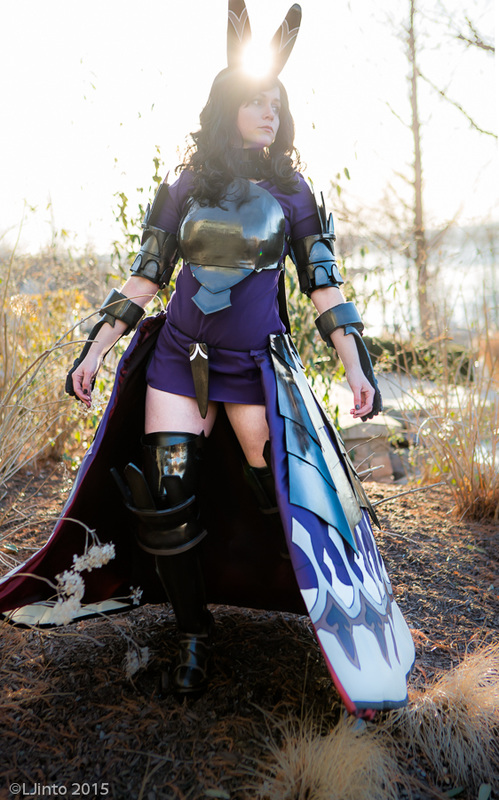
Due to the intense volume of armor, I decided to make everything out of craft foam and cardboard. It was certainly not the sturdiest or most durable choice, but at $7.99 per roll, it was good enough for my needs. In hindsight, I probably would have incorporated some worbla or sintra into various pieces that experience strain, such as the “vertebra” on the back. Live and learn.
To shape and seal the foam, I used a hair dryer, super glue, wood filler (to minimize the seams), and Elmer's glue and Easy Cast resin as sealants. I like using resin because it provides a hard finish after only a couple of layers, versus glue or mod podge, which typically take many more. I painted everything with acrylics and added one final layer of resin to create a glossy top-coat. Everything attaches with belts, snaps, Velcro, ribbon, or super strong magnets. Basically anything I could find!
Besides the armor, the most time-intensive part of the project was the skirt. I used this tutorial for an open-front hoop skirt and essentially used the hoopskirt as a middle layer, as you would use boning in a bodice. For the bottom-most layer, I used a long piece of stiff aluminum to ensure the skirt wouldn’t fold in on itself and would maintain the correct shape. From there, I draped an overskirt and used a stencil, heat n bond, and a lot of patience to attach the applique along the bottom of the skirt.
The dress was just a simple day project using a nice thick stretch polyester and the wig was part of the natural collection from Epic Cosplay.
Worn to: Katsucon 15
Difficulty: 5/5
I was on the hunt for an armor-heavy costume when my friend Krystal stumbled across the design for Ivybeth. Although I had no knowledge of the game (a beta called Bravely Default: Praying Brage) I loved the design so much that I really wanted to give it a shot.
Due to the intense volume of armor, I decided to make everything out of craft foam and cardboard. It was certainly not the sturdiest or most durable choice, but at $7.99 per roll, it was good enough for my needs. In hindsight, I probably would have incorporated some worbla or sintra into various pieces that experience strain, such as the “vertebra” on the back. Live and learn.
To shape and seal the foam, I used a hair dryer, super glue, wood filler (to minimize the seams), and Elmer's glue and Easy Cast resin as sealants. I like using resin because it provides a hard finish after only a couple of layers, versus glue or mod podge, which typically take many more. I painted everything with acrylics and added one final layer of resin to create a glossy top-coat. Everything attaches with belts, snaps, Velcro, ribbon, or super strong magnets. Basically anything I could find!
Besides the armor, the most time-intensive part of the project was the skirt. I used this tutorial for an open-front hoop skirt and essentially used the hoopskirt as a middle layer, as you would use boning in a bodice. For the bottom-most layer, I used a long piece of stiff aluminum to ensure the skirt wouldn’t fold in on itself and would maintain the correct shape. From there, I draped an overskirt and used a stencil, heat n bond, and a lot of patience to attach the applique along the bottom of the skirt.
The dress was just a simple day project using a nice thick stretch polyester and the wig was part of the natural collection from Epic Cosplay.
